Lab# 7: Evaluate chatbot
You can unit test your Flow. However, Prompt flow provides a gallery of sample evaluation flows your can use to test you Flow in bulk. For example, classification accuracy, QnA Groundedness, QnA Relevant, QnA Similarity, QnA F1 Score etc. This enables you to test how well your LLM is performing. In addition, you have the ability to examine which of your variant prompts are performing better. In this example, we’ll use the QnA RAG Evaluation template to test our flow.
import chatbot flow from local to cloud
- Open Azure Machine Learning Studio (https://ml.azure.com/). The click on the Prompt flow navigation option on the left-hand side of the screen.

- Click + Create button.
- Scroll down the pane and to the Import section. Then click on the Upload button the Upload from local .
- On the Upload from local pane, click on the Browse button and select the master folder from the workshop repo directory.
- Enter Folder Name pane (e.g. dental_chatbot).
- Select Chat from the Select flow type.
- Click on the upload button. The flow will be open in your Azure Machine Learning studio.
Create connection to AzureOpenAI
- Click on the Prompt flow navigation option
- Click on the Connections tab on the Prompt Flow page
- Click on the Create button, then select Azure OpenAI option in the drop-down menu
- Enter a Name
- The Azure OpenAI option should be selected for Provider.
- Select your subscription under Subscription id.
- Select your OpenAI instance name under Azure OpenAI Account Names drop-down menu.
- Paste the Key 1 value for Azure OpenAI you copied earlier in the API key textbox.
- Paste the Language API URL you copied earlier in the API base textbox.
- The API type should be set to the default value (e.g. azure)
- The API version should be set to the default value (e.g. 2023-07-01-preview)
- Click Save
Add AzureOpenAI connection to chatbot flow
- Click on the Flows tab on the Prompt Flow page.
- Select the Flow name you created earlier (e.g. dental_chatbot).
- On the embed_question node, click on the connection textbox and select your AzureOpenAI connection name.
- On the prompt_answer node, click on the connection drop-down menu and select your AzureOpenAI connection name. Then select yoar AzureOpenAI deployment_name.
- In the Output section, click on the Add output. Then enter context for the Name and ${search_vector_index.output} for the value.
- Click on Save button on the top right-hand side of the screen.
Evaluate chatbot flow
1..Click on the Evaluate button on the top right-side of the screen.

- On the Batch run & Evaluate page, select the Next button
- On the Batch run settings page, click on Add new data link for the Data field.
- Enter Name on the Add new data pane (e.g. Contoso-Dental). Then Browse to the workshop repo directory and select the contoso-dental.csv file from the /data folder.
- Click on the Add button. A preview of the top 5 rows of the data should be displayed at the bottom of the page.
- Under Input mapping, enter the open and close brackets [] for the value of chat_history.
- Click in the Value textbox for the question field and enter ${data.question}.
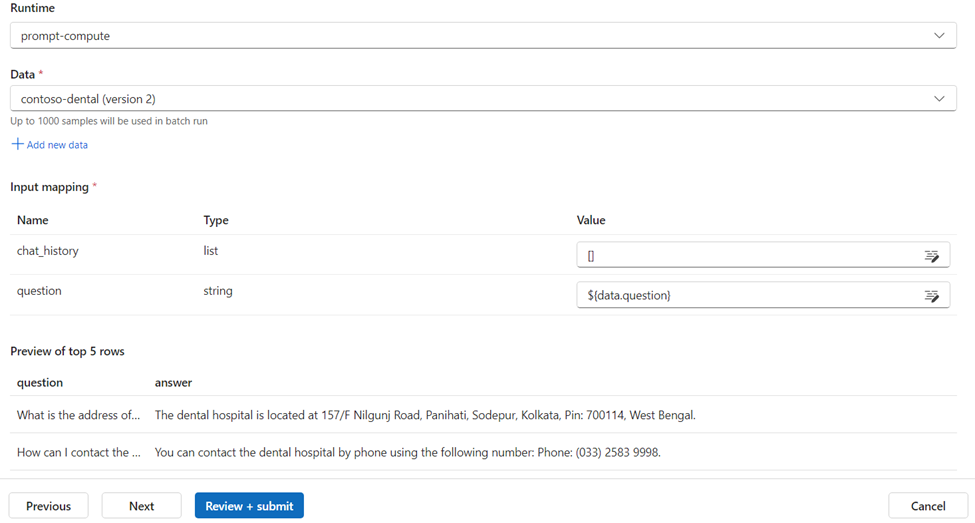
- Click the Next button.
- On the Select evaluation page, select the checkbox for the QnA RAG Evaluation.
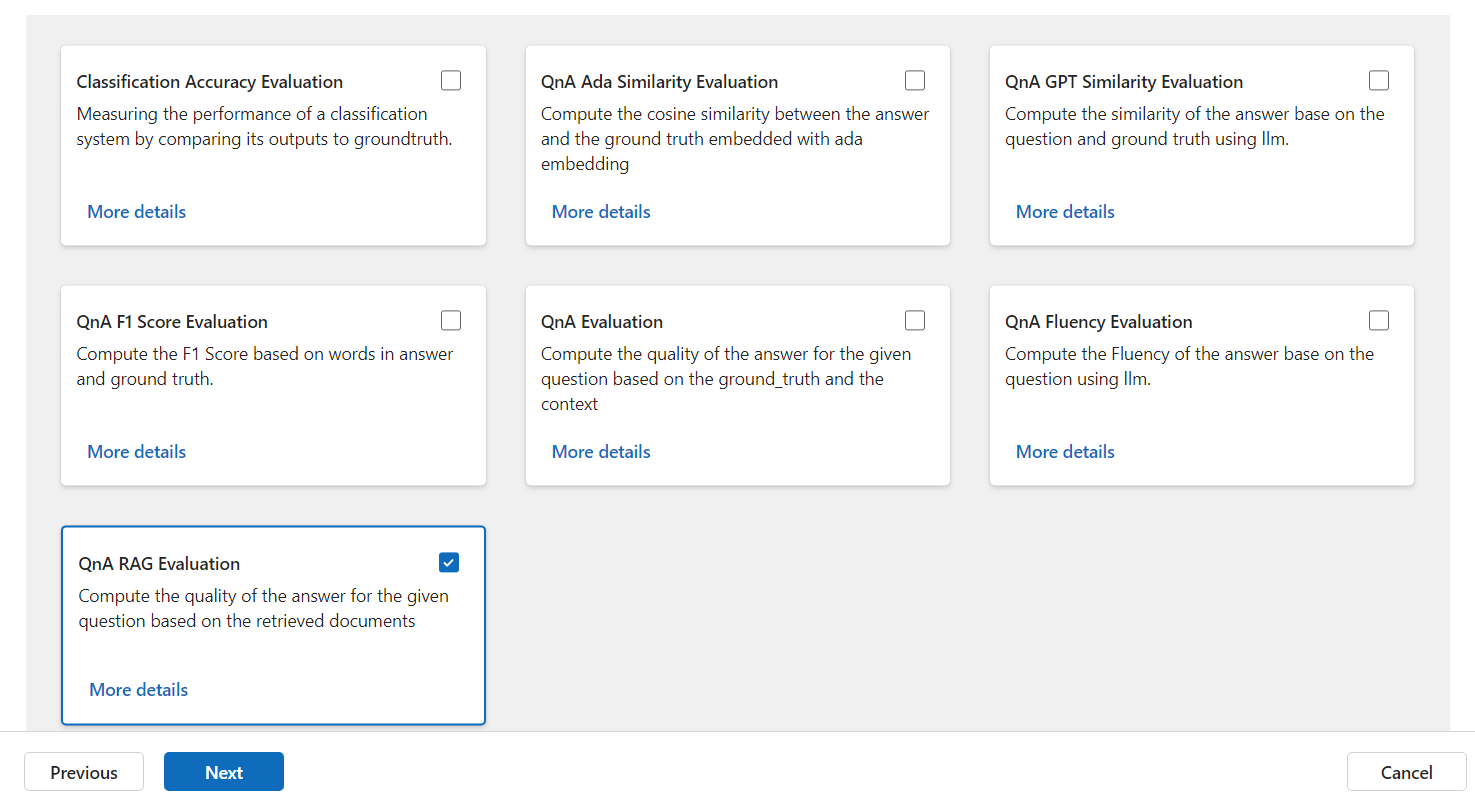
- Click the Next button.
- Click on the right arrow “>” to expand the QnA RAG Evaluation settings.
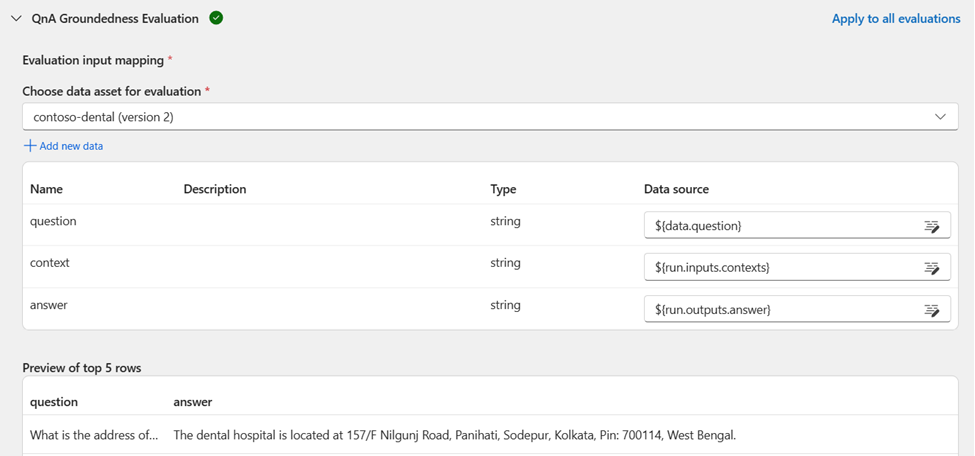
- Select the dataset your uploaded earlier for the Choose data asset for evaluation field.
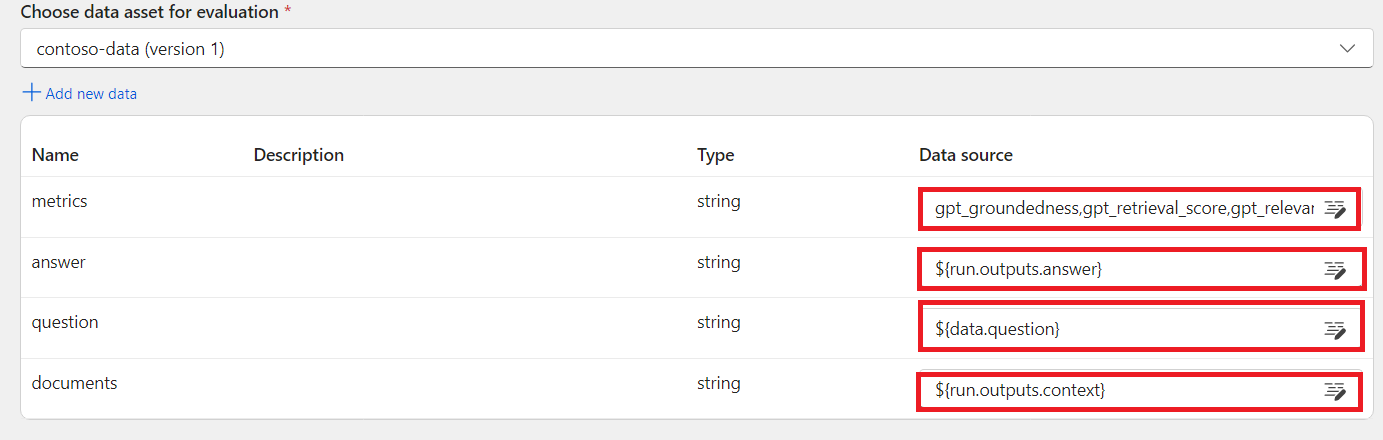
- For the metric field, cope and paste the following text:
gpt_groundedness,gpt_retrieval_score,gpt_relevance
- Enter ${run.outputs.answer} for the answer field.
- Click on the Data Source textbox and enter ${data.question} for the question field.
- Enter ${run.outputs.context} for the documentsfield.
On the right-hand side of the page, scroll down to the bottom of the page.
Select your AzureOpenAI connection name for the Connection fields.
The Deployment name / Model should automatically population the your AzureOpenAI deployment name.
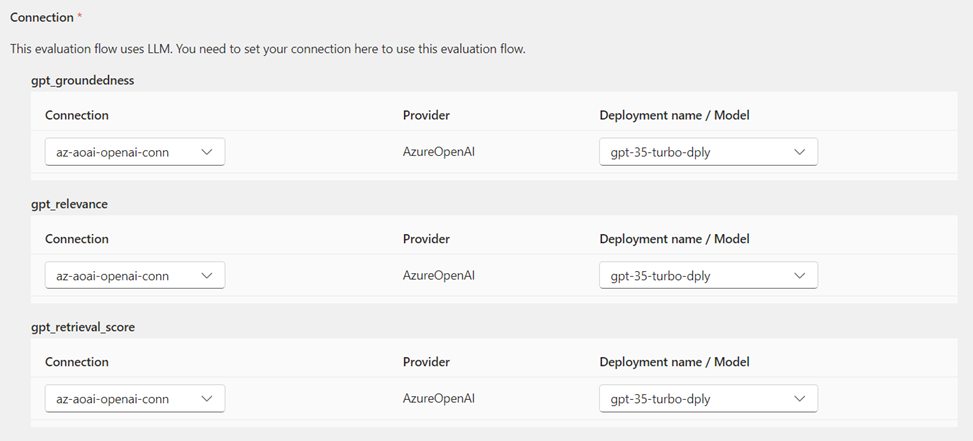
Click the Next button.
Finally, click on the Submit button.
To monitor the run progress, click on the Prompt flow navigation option. Then click on the Runs tab
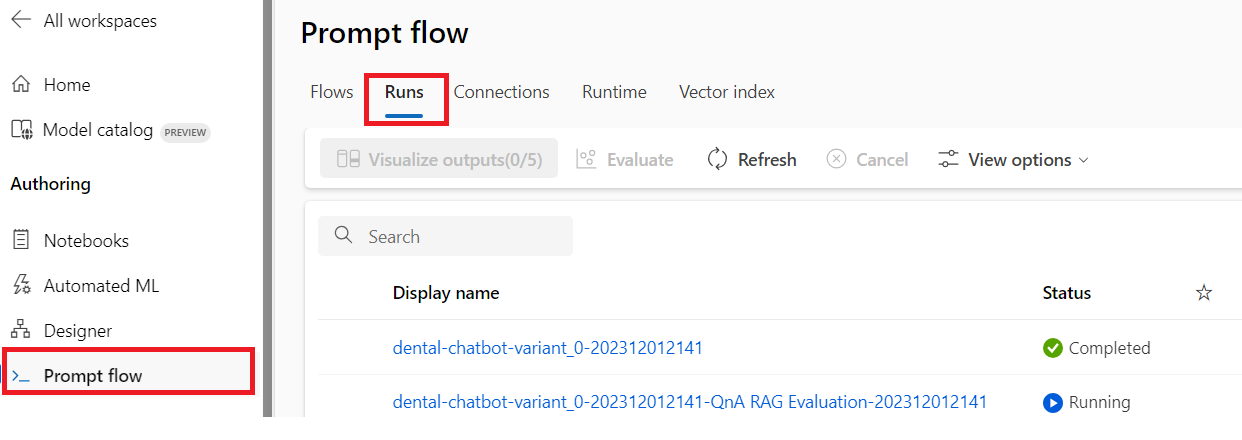
- Click the Refresh button to update the run status. The run should take ~15 minutes.
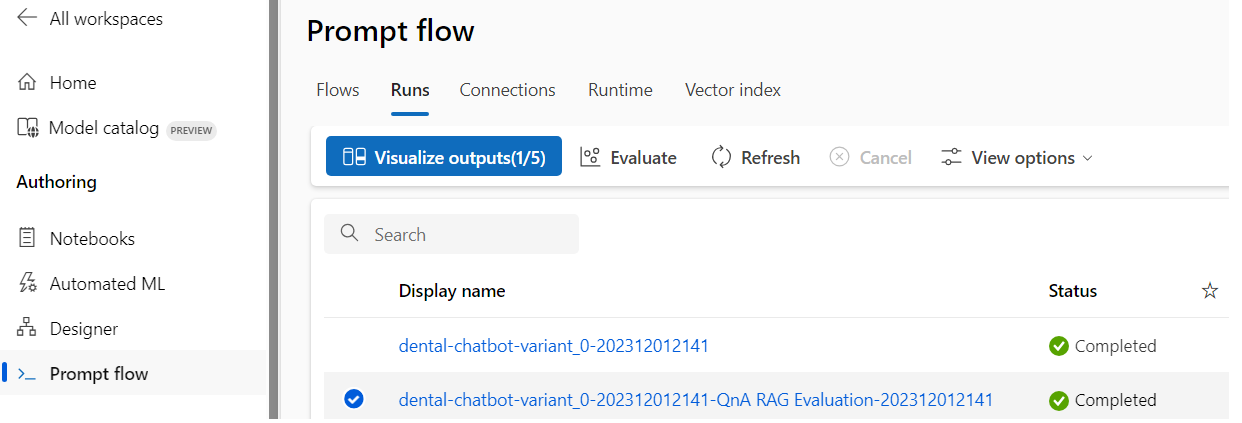
- Click on the radio button for the QnA RAG Evaluation, the press the Visualize outputs to view the results.
The Runs & metrics section shows a summary score for gpt_groundedness, gpt_retrieval_score, and gpt_relevance. The Outputs section shows the detailed results for each of the 3 metrics.

The score will range from 1 to 5, where 1 is the worst and 5 is the best performance.
Summary
In this lab, we learned that while building generate AI solution, it is important to apply responsible AI principles. We learn that even when an AI app provides the correct answer, it is important to validate that the answer is grounded to the context it's data source. Even when the answer is grounded, it is important to validate that the answer is relevant to the question. Finally, it is important to validate that the answer is similar to the answer provided by the data source. In the content of Contoso dental clinc, we learn the important of the chatbox giving out information that pertain to their specific clinic.
Next, we learn how vector index are useful in storing and retrieving custom data, instead of using a pre-trained LLM where the data may be out of date or not relevance to your unique use case.
Finally, we learn how vector embedding is useful in converting text to numeric representation. This makes if useful in storing data base on thier relationship distance and similarity. Search is quicker and more accurate when using vector embedding.