Lab# 4: bring your own data
Open AI and most LLM models are training from various publicly available data. However, there are instances where we need to use our own data and narrow the actions and data search of our LLM prompts to focus only on the scope of our data or expand the data from LLM model to include our data as well. To use your own data in a LLM, you need to convert you data into numeric values. Each word mapping to a specific number (token). Then you train a model to find similarities, collations, or word association, the model creates vector indexes to the word associations. The good thing is the Prompt Flow service provide an easy-to-use process your to upload dataset and it generates model and the Vector indexes.
To upload custom data for this lab, you need to use the Contoso Dentist clinic data located in data/contoso_dental.xls.
- Open the src/create_faiss_mlindex.ipynb notebook in the Visual Studio Code editor.
- Click on the Select Kernel button.

- Select Python Environment from the drop-down menu. Then pick the conda Python 3.8 kernel.
- Before running the notebook, you need to replace the following placeholders with values with your Azure OpenAI connection details:
- os.environ["AOAI_CONNECTION_NAME"]: Replace with your prompt flow connection name you created above.
- os.environ["AOAI_API_KEY"]: Replace with your Azure OpenAI API key.
- os.environ["AOAI_ENDPOINT_URL"]: Replace with your Azure OpenAI API endpoint. os.environ["TEXT_EMBEDDING_DEPLOYMENT_NAME"]: Replace with your Azure OpenAI deployment name for the text-embedding-ada-002 model.
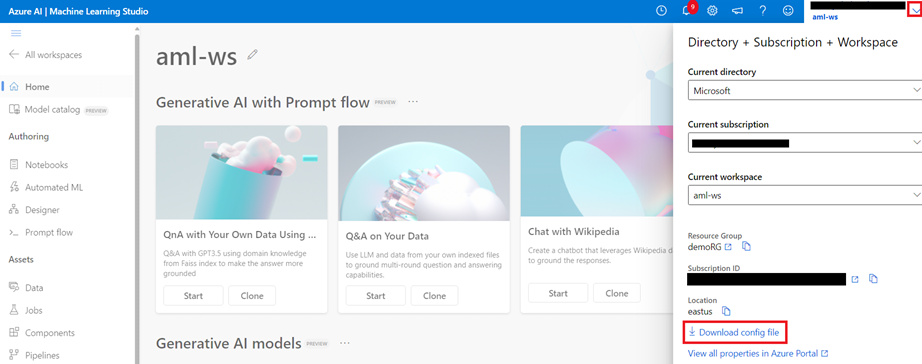
- Next, you need to upload your config.json file to the Azure ML workspace. To do this, open Azure ML studio.
- On the right corner the page, click on the down arrow.Click on the Download config file button.
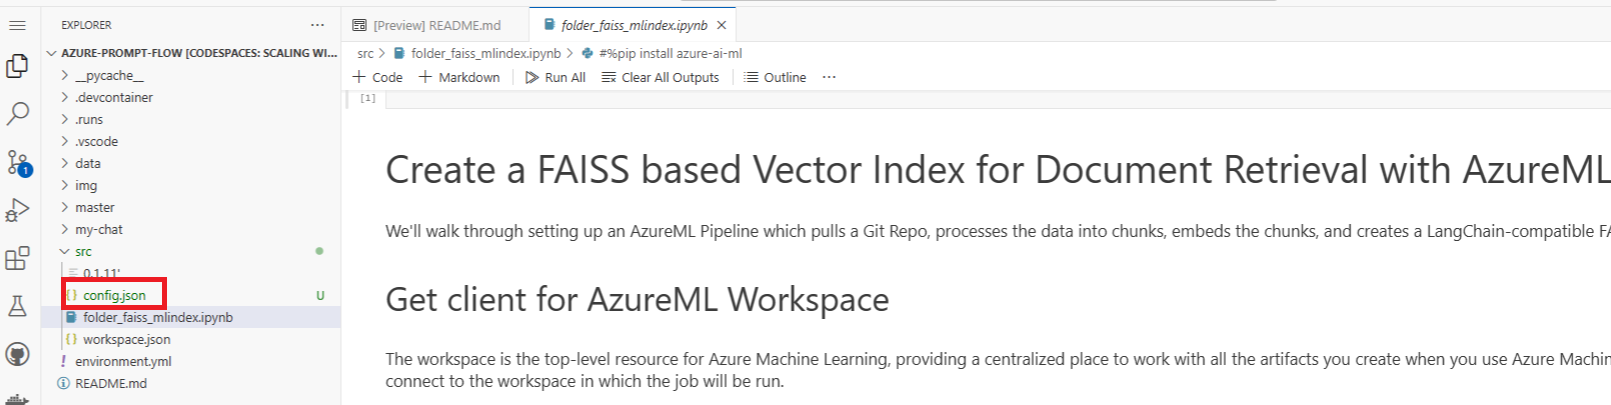
- Then browse to the download config.json file in your local director. In the Visual Studio Code editor, click on the src folder and upload or paste the config.json to the directory.
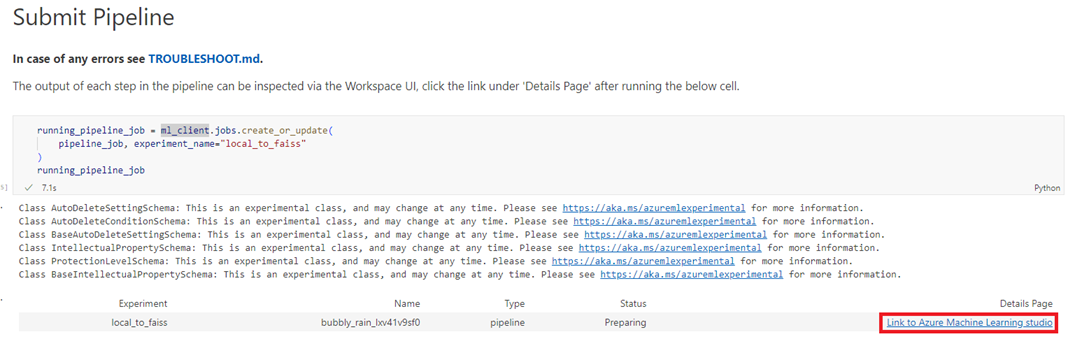
- Click on the Run All button on the top of the notebook to run the notebook.
- It take ~10 for the notebook to running.
- Click on the Link to Azure Machine Learning studio click in the notebook to open the Azure ML job pipeline.
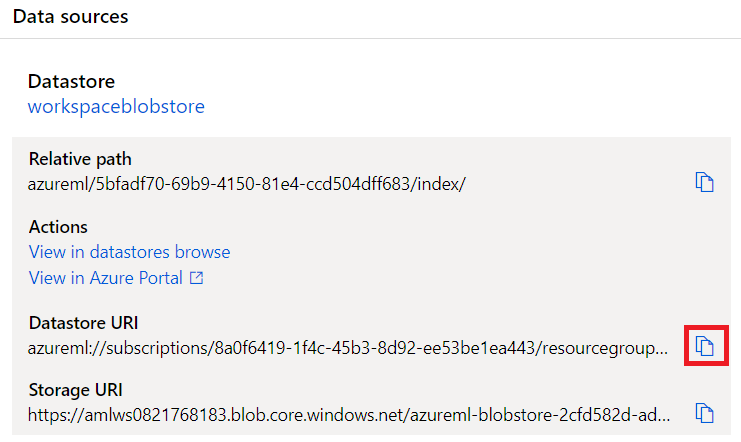
- On the left-hand side of the page, click on the Data open.
- Under the Data sources, click dental_faiss_mlindex to open the vector data.
- Finally copy the Datastore URI value. We’ll use this value in the next exercise.